Many Android users want to capture their device’s display for various purposes. They often prefer avoiding additional applications. Modern Android phones come with built-in capabilities for this function.
Android’s official feature arrived with Android 11. Some manufacturers like Samsung, LG, and OnePlus included their own versions earlier. The process differs slightly across devices and Android versions.
This native functionality typically captures both visual content and audio. It often includes options to show touch interactions during the recording. Learning to use these built-in tools helps avoid unnecessary app downloads.
Screen captures are useful for tutorials, gameplay, or documenting issues. According to Asurion’s guide, understanding your device’s capabilities ensures better compatibility. This comprehensive overview covers major Android versions and manufacturer variations.
Understanding Android’s Built-In Screen Recording Capabilities
Android smartphones contain powerful native tools for capturing display activity. These integrated functions eliminate the need for third-party applications. Users can access these features directly through their device settings.
Native Screen Recording Feature Availability
The availability of built-in screen capture varies across Android versions. Google officially introduced this function in Android 11. Some manufacturers implemented it earlier in their custom interfaces.
Samsung devices featured screen recording since Android 9. Their implementation offers more customization options than stock Android. These include audio settings and video quality adjustments.
Differences Between Android Versions and Manufacturers
Various Android skins provide unique recording experiences. Manufacturer implementations often include additional features. Google Pixel devices offer a cleaner, more streamlined approach.
Key variations include:
- Settings customization options
- Audio recording capabilities
- Video quality selections
- Interface placement and access
The specific Android version on your device determines available features. Manufacturer customizations further enhance these native tools.
What You Can Record Without Additional Apps
Built-in screen recorders capture various types of content. They typically include both system audio and microphone input. Most devices allow showing touch interactions during capture.
Common recording capabilities include:
- Full screen capture
- Specific application recording
- System sound recording
- Microphone audio capture
- Touch indicator display
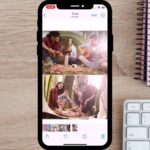
Videos automatically save to the device’s gallery or Photos app. They usually organize into dedicated folders for easy access. Understanding these capabilities helps maximize your device’s potential.
Step-by-Step Guide: How to Record Screen on Android
Accessing your Android’s display recording feature starts with a simple swipe gesture from the top. This built-in functionality provides a straightforward method for capturing your device’s activity without additional software.
Accessing the Quick Settings Panel
Begin by swiping downward twice from the very top of your display. This action reveals the complete quick settings panel with all available options.
Locate the screen record icon among the various tiles. You might need to swipe horizontally to find it if not immediately visible.
If the option isn’t present, tap the edit button. Drag the screen recorder tile into your active quick settings for future access.
Configuring Recording Settings Before Starting
Before initiating capture, configure your preferred recording parameters. Most devices offer several customization options.
Key settings to consider include:
- Audio source selection (system sound, microphone, or none)
- Touch interaction visibility during recording
- Video quality preferences
These adjustments ensure your final recording matches your specific needs and requirements.
Initiating and Stopping the Recording Process
Once configured, tap start to begin the process. A brief countdown typically precedes actual recording commencement.
During capture, a notification or floating toolbar appears. This interface provides control options while recording is active.
To conclude your screen recording, swipe down from the top. Tap the screen recorder notification or use the visible stop button.
“The built-in screen recording feature offers remarkable convenience for quick captures without app installations.”
Finding Your Recorded Screen Videos
After stopping your recording, the video automatically saves to device storage. It typically organizes into a dedicated folder for easy retrieval.
Locate your captured content in the Photos application. Navigate to Collections > On this device > Movies section.
Alternatively, check your Gallery app for a Screen Recordings album. The process remains intuitive across most Android implementations.
Device-Specific Screen Recording Methods
The native screen recording experience differs significantly across various Android device brands. Each manufacturer implements unique approaches to this functionality. Understanding these variations helps users maximize their device’s capabilities.
Samsung Galaxy Devices Recording Process
Samsung Galaxy phones provide one of the most comprehensive built-in screen recorder experiences. Users access this feature through the quick settings menu. They tap the dedicated screen recorder icon to begin.
Long-pressing the icon reveals advanced configuration options. These settings include:
- Audio source selection for system sound or microphone
- Video quality adjustments for optimal file size
- Front camera picture-in-picture size options
During capture, a floating toolbar offers additional functionality. Users can draw on their screen or pause the recording. This feature-rich approach makes Samsung’s implementation stand out.
Google Pixel Screen Recording Features
Google Pixel devices take a minimalist approach to screen capture. The process begins in the quick settings panel. Users select either single app or full screen recording.
Both options support audio recording from the device. However, touch indicators only appear during full screen captures. The Pixel interface maintains simplicity throughout the process.
Key characteristics include:
- No intrusive toolbar during recording
- Basic start/stop functionality without pausing
- Clean integration with the Photos application
Other Android Manufacturer Variations
Various Android brands implement their own screen recording solutions. LG, OnePlus, and Xiaomi each offer unique features. These differences stem from their custom Android interfaces.
Common variations across manufacturers include:
- Different quick settings panel locations
- Varied audio source configuration options
- Unique video quality settings
- Distinct saving locations in gallery apps
Some devices require enabling the feature in settings first. Regional variations may also affect availability. Checking your specific device’s capabilities ensures optimal results.
Troubleshooting Common Screen Recording Issues
Even with built-in functionality, users sometimes encounter obstacles when capturing their display. These challenges range from missing options to audio complications. Understanding common problems helps achieve better results.
When Screen Recorder Option Isn’t Visible
Many people cannot find the screen record icon in their quick settings panel. This typically happens on older Android versions or certain devices.
The solution involves editing your quick settings tiles. Swipe down from the top screen twice to access all options. Tap the edit button and drag the screen record option into active positions.
Some manufacturers hide this feature in system settings. Check your phone’s advanced features menu to enable it first. This ensures the icon appears where expected.
Audio Recording Problems and Solutions
Audio issues represent frequent complaints during screen capture. Users often discover their recordings lack sound afterward.
Always verify audio settings before you tap start. The countdown period provides final confirmation opportunities. Select system audio, microphone input, or both according to needs.
Permission problems might prevent proper audio capture. Check your device’s app permissions for the recording function. Ensure microphone and media access remain enabled.
“Proper audio configuration before starting recording prevents most sound-related issues in screen captures.”
Managing Video Quality and Storage
High-quality recordings consume substantial storage space. This becomes problematic on devices with limited memory.
Adjust video quality settings before you start recording. Lower resolutions work well for casual captures. This approach preserves storage for more important content.
Recorded files automatically save to your photos application. Navigate to Collections > On this device > Movies to locate them. Regularly delete unnecessary files to free up space.
Some content protection systems block recording entirely. DRM-protected videos and secure apps may appear blank. This limitation affects all screen capture methods equally.
Conclusion
Modern Android devices offer robust built-in tools for capturing your display. These features eliminate the need for third-party applications.
The process varies slightly across different phones and software versions. Users can access the function through quick settings or device menus.
Recorded videos save directly to your gallery or Photos app. This provides convenient access for sharing or editing content later.
Understanding your device’s capabilities ensures successful screen captures. Regular software updates may introduce new features or change existing options.
With practice, anyone can master their phone’s native recording functionality. This guide provides all necessary steps for getting started.
FAQ
Which Android devices have a built-in screen recorder?
Most modern Android phones include a native screen recording feature. Samsung Galaxy, Google Pixel, and OnePlus devices typically support it. Older or budget models may require a third-party app.
How do you access the screen recorder on an Android phone?
Swipe down from the top of the screen to open Quick Settings. Look for the Screen Recorder icon. If it’s not visible, edit the panel to add it.
Can you record internal audio while screen recording?
Yes, many devices allow internal audio capture. Before starting, tap the settings or microphone icon to enable sound. Some phones may also record external audio through the microphone.
Where are screen recordings saved on an Android device?
Recorded videos are usually stored in the Photos app or Gallery, in a dedicated screen recordings folder. Some devices save files directly to internal storage.
Why is the screen recorder option missing from Quick Settings?
The option might be hidden or unavailable on older Android versions. Check if your phone supports the feature. You can often add it by editing the Quick Settings tiles.
How can you improve video quality when recording your screen?
Adjust resolution and bitrate in the recorder settings before starting. Higher settings produce better quality but use more storage. Ensure sufficient space on your device.
Does screen recording work on all apps and content?
Most content can be recorded, but some apps, like streaming services, may block recording due to copyright protection. The screen may appear black or show an error in those cases.